Repairing my roof leak
Everyone has probably heard me complain about the roof leak in the Roadmaster. Those who’ve seen the car never tire of asking about the missing rear trim panel in the cargo area that lets me check the inside of the fender well for water. When I got the wagon it was emitting a mysterious sloshing sound when I went around corners. After a lot of sleuthing I discovered that the drain plugs in the rear fender were plugged up and there was about 2 gallons of water collected inside the fender well. These wagons are notorious for roof leaks and it’s very common for the spare tire well to rust through due to water draining down from the roofline. Presumably no one has ever looked in the fender well on the drivers side as it seems pretty likely that I’m not the only one who’s got the problem. In my case the spare tire well was so thoroughly caked with undercoating that it looked like the car had just climbed out of La Brea. Now that I have the tire well all cleaned out, I discovered that the roof was leaking on both sides of the car rather than just the one. I’m getting tired of having to always ensure that the car is parked nose up in the driveway to allow water to drain back into the rear fenders so it’s time to get this fixed.
I don’t really know where the leak is coming from but I can see some water stains and rust marks on the inside of the D-Pillar when I remove the pillar garnish from the cargo area. Clearly the water is running down there from the roofline somewhere and given the experiences of so many other wagon owners, it seems likely that the roof rack is the problem.
I took a look in my factory service manual and found how best to remove the rack. There are a number of screws along the rack that thread into captive nuts set in the roof. These captive nuts are generally the culprits in the event of a leak. I pulled out all of the screws and pondered how to proceed as the rack still would not come off. It was held on the car at the leading edge. In the front edge of the roof rack there is a threaded bolt that fits through a hole in the roof and a nut fits on it from the inside. I’m not sure why the whole rack is attached to the car with screws except for one end but it’s a pain. Needless to say, removing the headliner in the car is a necessity. I didn’t relish the idea of removing all of the  pillar trim and dropping out the headliner to get at these nuts but once I had removed the other screws and shifted the rack around a little it seemed pretty likely that it would certainly leak at that one remaining bolt if it hadn’t already. The circular hole shown in the picture is the access point for the nut holding on the front most part of the roof rack.
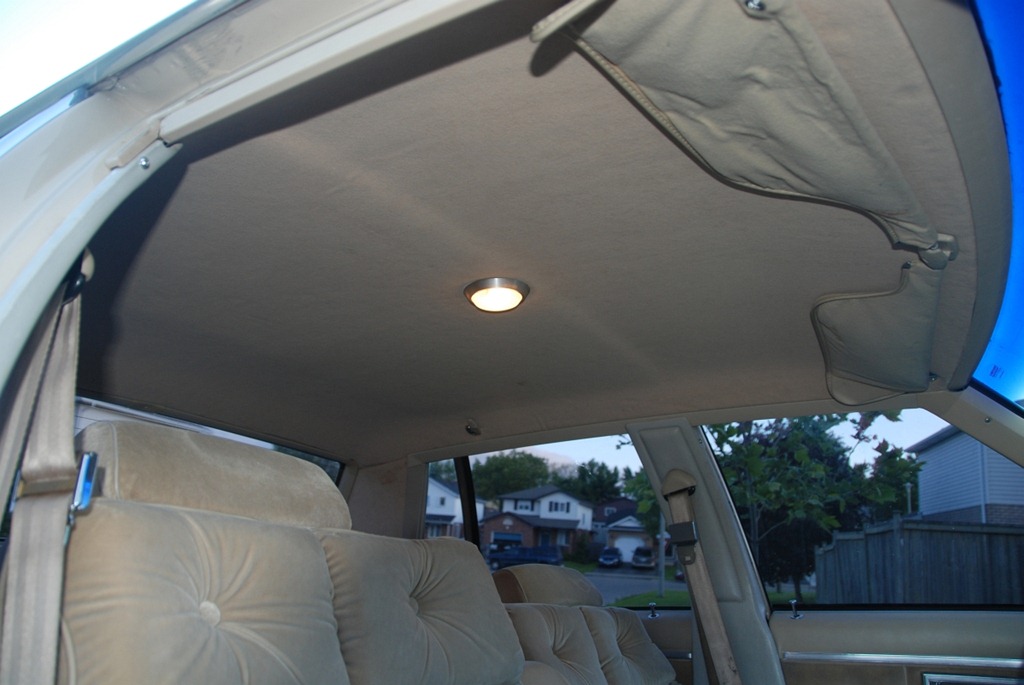
I found that I was able to lower the headliner without having to remove the whole thing. I had already removed the D-Pillar trim in the cargo area and the next obstacle was the trim at the C-Pillar. The biggest obstacle to removing the C-Pillar is the seat belt bolt. Not all of us have the necessary jumbo Torx bit to get that Pillar removed. By pulling on the trim slightly I discovered that the seat belt bolt was threaded into a bracket and the bracket was affixed to the car with standard bolts. By pulling on the C-Pillar trim I was able to get the seat belt bracket removed from the body with a
  wrench.
It was necessary to remove the passenger area courtesy light and the support handle to get the headliner low enough to access the bolt hole shown above. Once it’s done it’s not too tough to get in there with a small ratchet and remove the nut holding on the roof rack. From there I cleaned off the roof and sealed up the holes. I put a coating of sealant around each hole and I put some caulking down inside each of the captive nuts. Before reinserting each of the roof rack screws I coated the threads and the underside of each screw head with caulking. Subsequent testing showed that none of the screw holes were leaking. Unfortunately, I also determined that the screw holes were not where the leak was originally coming from. I did manage to find the roof leak. I’ll document what I found and how I’ve attempted to repair it tomorrow.